Secure VPS with CloudFlare Zero Trust in 5min
You’ve probably heard about the xz backdoor, which has unsettled admins all around the world, and you likely still remember Log4Shell - another CVE10 that sent shockwaves through IT security teams a few years back.
What if I told you that for in-company (and beyond) apps, you can easily reduce exposure to such vulnerabilities?
A Zero Trust network can provide you with a second layer of security to protect your infrastructure. It’s a cloud-suited, highly scalable alternative solution to VPNs or Citrix.
This article presents an example architecture of a Zero Trust network. Additionally, it provides a tutorial on how to build your first Zero Trust network using Cloudflare.
We chose Cloudflare as an example Zero Trust network provider because, at Iterative Engineering, we’ve integrated Cloudflare solutions to secure our internal infrastructure
Who may find this article helpful
- Security Professionals responsible for safeguarding their organization’s infrastructure against cybersecurity threats
- Administrators and Network Engineers involved in the deployment and management of IT infrastructure
What will you learn
- The article will provide a detailed tutorial on building a Zero Trust network using Cloudflare as an example provider.
- What are the advantages and risks of selecting a Zero Trust Network provider
Prerequisites
- Cloudflare account. It’s free to create, but you must provide credit card details during registration. The services presented in this article are free for <50 users.
- VPS like free EC2 instance on AWS or even your private laptop as the host
- Docker installed on the machine. It’s not a strict requirement, but with Docker it’s just easier
- Registered domain like iterative.pl. It’s slightly easier to manage the network if the domain is registered in Cloudflare, and this article assumes that you have set it like that
Steps over we’ll go through
- Zero Trust network definition
- Setting up Zero Trust network with Cloudflare
- Securing the app by Google authentication provider
What is Zero Trust security?
It’s an IT security model where access to resources on a private network is granted only after thorough verification of the identity of every person and device seeking access.
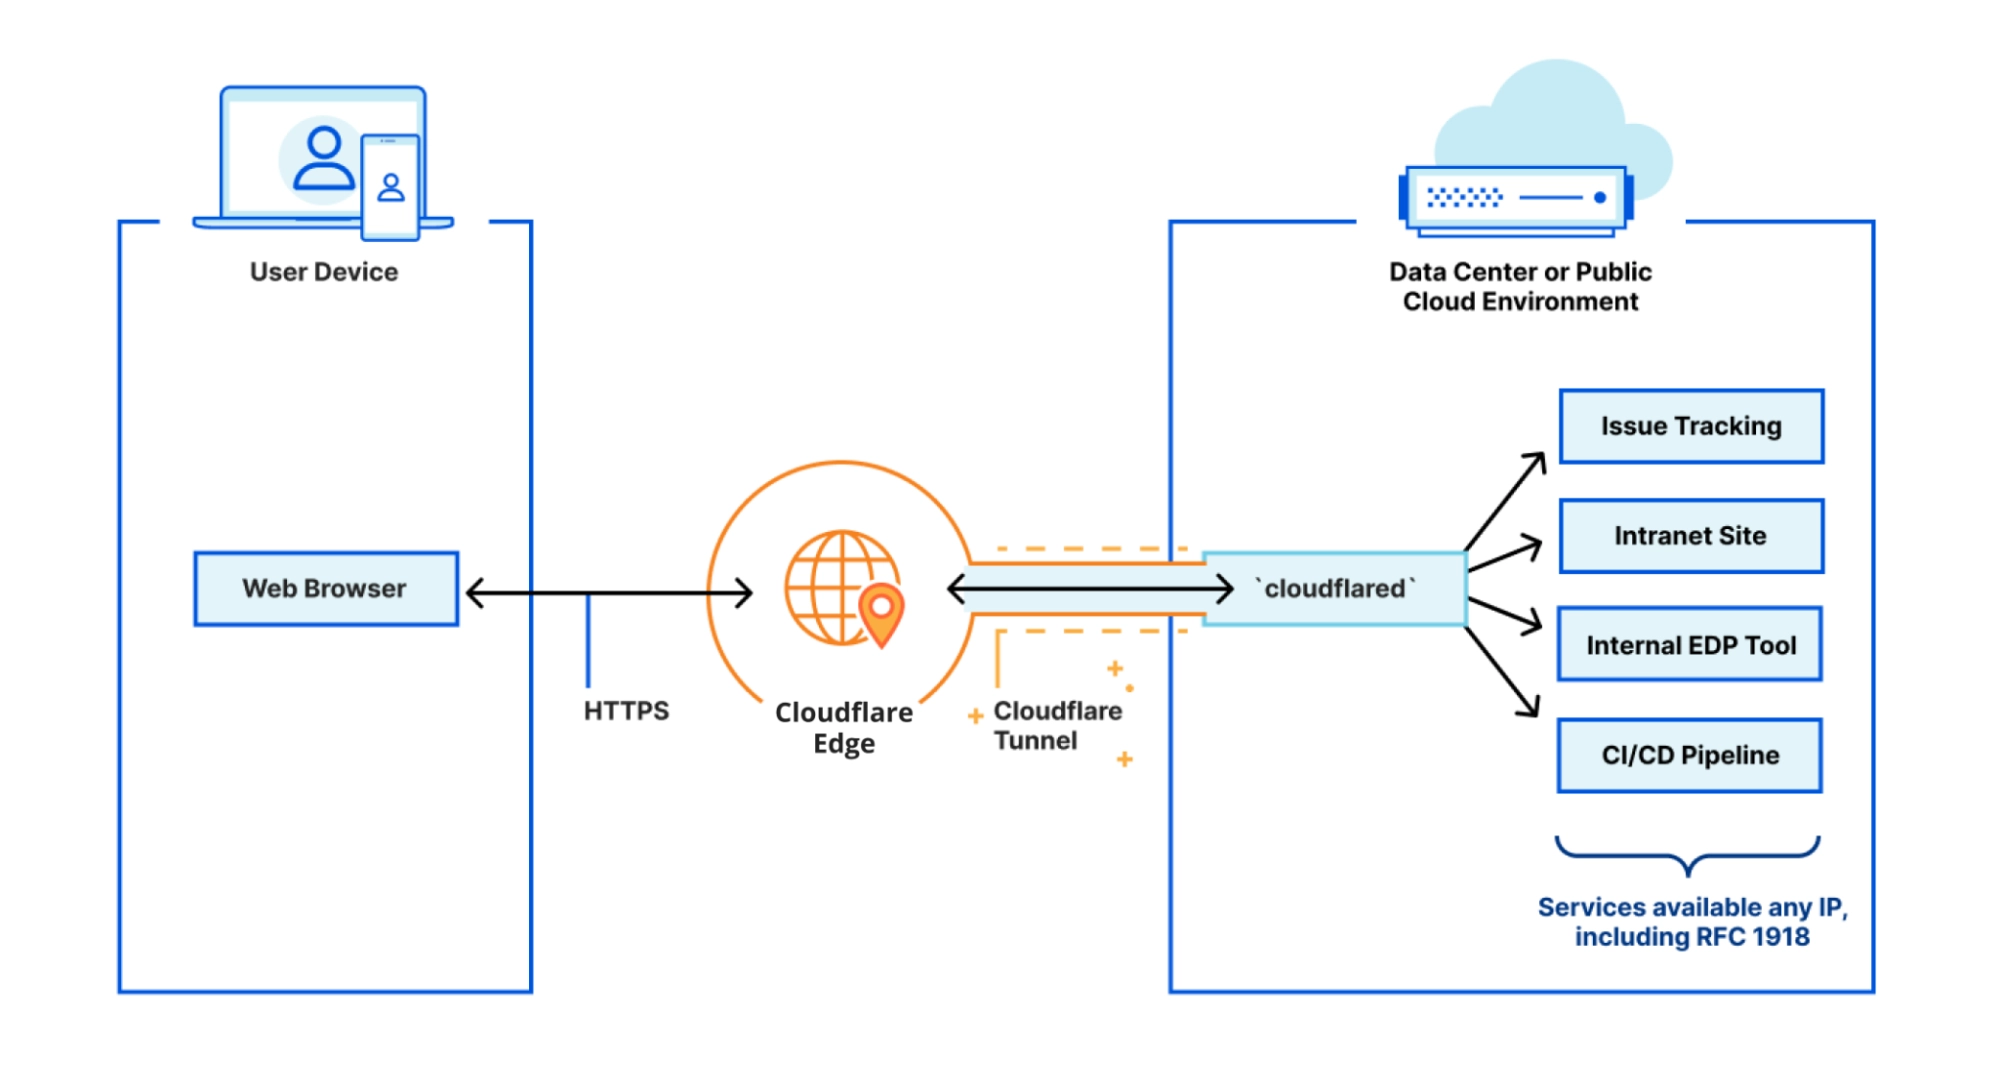
This is the architecture schema of Cloudflare Zero Trust 
From the user perspective - there is no difference, no need to install any apps or additional software (required in VPN networks). On the server side - the big difference is that the request first hits the Zero Trust provider infrastructure, and then via the tunnel, it goes to the service that handles it. The response comes back accordingly - via the tunnel.
Configure the Cloudflared tunnel
So, let’s dive in and begin configuring the tunnel!
Log in to your Cloudlfare Zero Trust account
Under the Networks tab open Tunnels and click Create a tunnel

This art focuses on the Cloudflared connector, so select this one as the type of tunnel:

Name your tunnel however you want and save it:

Choose the OS on which the tunnel will be hosted. This article presents how to do it via Docker because then you can run it almost anywhere

Copy the docker command generated by the configurator. As the warning suggests the token parameter should be kept in secrecy

The final step in the configurator involves setting a Public Hostname for your Zero Trust network. This necessitates setting up a domain first. Cloudflare will create the subdomain if you specify it

In the Service section, you choose which resource on the server the traffic is proxied to It’s set to http://nginx:80, aligning with the docker-compose example provided below

Public Hostnames vs Private Hostnames
In the Public hostnames, you need to choose the domain (or subdomain) associated with the tunneled service. Under this DNS name, the service will be accessible on the public internet.
Private Networks allow Zero Trust communication between services without exposing them to the public internet, so we don’t need to configure it in our example.
Configure the Cloudflared connector
Now, it’s time to set up the Cloudflared connector on the server. While you could use the Docker command generated by the configurator, for full-featured functionality, it’s easier to utilize this handy Docker Compose file.
First, save it as docker-compose.yml on your server. Just set your token by replacing your_secret_token placeholder
services:
 cloudflared:
   image: cloudflare/cloudflared
   command: tunnel run
   environment:
     - TUNNEL_TOKEN=your_secret_token
 nginx:
   image: nginx
Then start the containers by executing
docker compose up
This starts two containers: nginx to host its default html file and the Cloudflared connector. The connector opens an outbound connection from your host to the Cloudflare infrastructure, routing all requests executed against zero-trust-subdomaine.your_domain.com (in our example, zero-trust.iterative.pl) through the Cloudflare infrastructure.
Such a page is an expected output in your favorite browser 
These simple steps provided your serve with
- SSL certificate issued and automatically renewed by Cloudflare
- HTTPS inspection (Cloudflare decrypts packages to inspect them and detect malware)
- DOS/DDos protection
In addition - the connector can expose services from machines that do not even have a public IP address
But that’s not all. You can configure finely-grained, restricted access to your application, allowing access only to users who authenticate themselves, for example, via a Google account. This approach fits perfectly for all company-internal applications.
Restrict access to your application
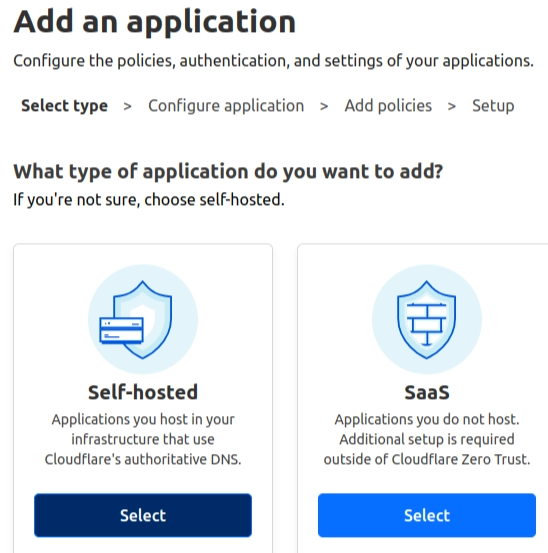
Open Applications and Add an application

Our nginx app is self-hosted, so this is the option that have to be selected

Choose the application name and refer to the same subdomain/domain as the configured tunnel (other options have sensible defaults).

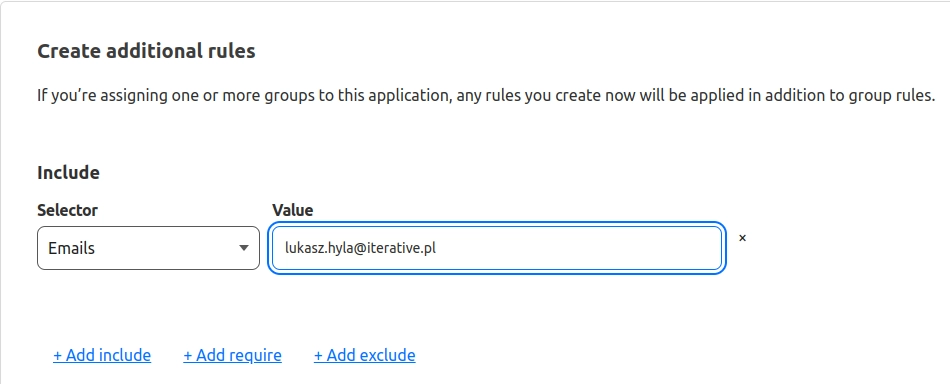
Let’s add a policy that allows only users with a specific email. First set the policy name and the allow action

Configure an include rule that accepts requests only from authenticated users that have specific email(s)

Since cookies and CORS settings are irrelevant in our example, simply click on Add application

Your app is now visible on the list of applications 
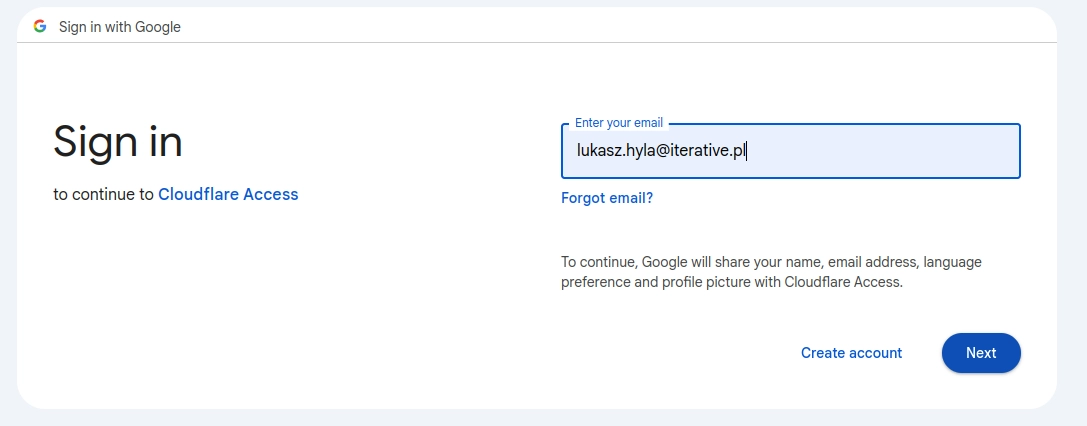
All requests to the application are authenticated against the application policies. If the user is not authenticated, they are redirected to the Google authentication login page.

Cloudflare enables the configuration of advanced policies based on request IP location, IP ranges, and email domains, etc. Additionally, ‘service’ tokens are available to facilitate communication between apps within the Zero-Trust network.
Overview of the solution’s architecture

Risks you accept by relaying on a Zero Trust provider:
Zero Trust means that you trust nobody except your zero trust provider.
If the provider controls the SSL certificate, they may conduct deep packet inspection (as Cloudflare does). This capability allows them to filter out malicious content, but it also means the provider has access to all data transmitted through their infrastructure. Alternatively, you can issue the SSL certificate yourself e.g. using Let’s Encrypt.
Outages of your provider may mean an outage of your services, e.g. Cloudflare outage on June 21, 2022.
Why did we select the Zero Trust Cloudfare network at Iterative Engineering?
- To reduce exposure to 0-day vulnerabilities, we sought to establish a first layer of security independent of the security provided by the underlying applications, such as Gitlab or Mattermost
- To not require users to install any VPN apps on their laptops or mobile devices to access the services, they can simply authenticate via their Google account.
Conclusions
- You can build your first Zero-Trust network for free with Cloudflare
- Cloudflare Zero Trust has various built-in features, including DDoS protection, monitoring, HTTPS inspection, Google authentication, and many others
- Since the Cloudflare tunnel opens an outbound connection, your services do not require public IP addresses to be accessible
- The Zero Trust network is a concept that competes with VPNs and, like VPNs, has many providers that may provide different sets of features
Further reading: Cloudlfare Zero Trust - Documentation
- Who may find this article helpful
- What will you learn
- Prerequisites
- Steps over we’ll go through
- What is Zero Trust security?
- Configure the Cloudflared tunnel
- Configure the Cloudflared connector
- Restrict access to your application
- Risks you accept by relaying on a Zero Trust provider:
- Why did we select the Zero Trust Cloudfare network at Iterative Engineering?
- Conclusions


